

How to Create an XML Sitemap for Your Website: A Worked Example
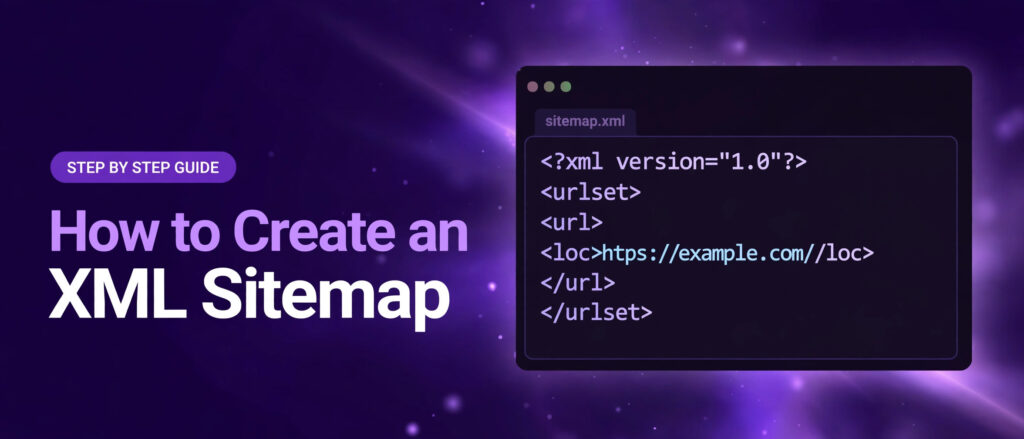
How to create an XML sitemap? Open the free LinkTrixx XML Sitemap Generator, paste your page URLs one per line, keep the default settings or set your own, copy the XML it builds, upload the file to your site, and submit it in Google Search Console. The whole job takes minutes, and this guide shows every step on a real example, built from five live LinkTrixx pages, with the exact XML output the tool produces shown line by line. No invented client, no invented result, and no made up number appears anywhere in this article. Every URL, every setting, and every line of output below is real and was checked against the live tool on 12 November 2026.
If you have not read the companion guide yet, start with what an XML sitemap is and why your website needs one. It explains the concept, the limits Google sets, and how a sitemap differs from robots.txt. This article is the practical half: the same tool, the same ideas, applied step by step to real pages, so you can follow along with your own site and finish with a valid sitemap.xml file ready to upload.
What This Worked Example Covers
This article builds one real sitemap for five real pages on linktrixx.com, using the free XML Sitemap Generator. It covers choosing the pages, pasting them into the tool, setting the three optional fields, reading the live preview, copying or downloading the finished file, uploading it to the site root, adding it to robots.txt, submitting it in Google Search Console, and checking the report afterwards. Each step shows what to click, what to type, and what the tool does in return, so you can repeat the same steps on your own pages without guessing.
The example uses LinkTrixx pages because they are live, public, and easy to check. The homepage, a service page, the blog index, and two published articles all return a 200 status, which is the first requirement for any URL in a sitemap. Your own site will have different pages, but the steps are identical: gather the canonical URLs of the pages you want found, paste them in, and let the tool build the file.
The Tool We Are Using
The tool is the free XML Sitemap Generator at linktrixx.com/tools/xml-sitemap-generator/. It is a browser tool, which means the sitemap is built on your device and your URLs never leave your browser. There is no signup, no account, and no limit on the page. The tool does not crawl a site. It only turns the URLs you paste into a sitemap, so you need to supply the list of pages yourself, one URL per line.
The page has four inputs and three buttons. The inputs are a text box labelled Your URLs, one per line, with nine rows and a placeholder showing https://linktrixx.com/; a date picker labelled Last modified, optional; a dropdown labelled Change frequency, with weekly selected by default; and a number field labelled Priority, optional, from 0.0 to 1.0, with 0.8 filled in by default. The buttons are Load sample, Copy, and Download. Below the output, a short note reports how many URLs are in your sitemap, or lists any line that was skipped because it is not a valid URL.
The settings you choose apply to every URL in your list. There is no way to set a different lastmod date or a different priority for one page inside the same run, so if your pages need different values, build the file in two runs and join the results, or edit the downloaded file by hand. For most small sites, one set of values for the whole file is fine, and that is what this example does.
The tool also has a Load sample button, which fills the URL box with five LinkTrixx pages: the homepage, the link building services page, the guest posting page, the blog index, and the tools hub. That sample is a useful starting point if you want to see the output before you paste your own list, and every URL in it is a live page. This worked example uses a slightly different list, because it includes two published articles, so you can see how blog posts look inside the file. The steps are the same either way.
Before we build, here is the one thing the tool cannot do for you. It cannot check whether a URL returns an error, and it cannot tell whether a page is set to noindex or blocked in robots.txt. It checks the shape of each line, not the page behind it. The five URLs in this example were each checked by hand and each returns a 200 status, so the file below contains only live, indexable pages. Do the same check on your own list before you paste it in.
Before We Build: Choosing the Pages
A sitemap should list the pages you want in search results, and nothing else. For this example, the list has five pages, chosen to show the three kinds of page most sites have: a homepage, a service page, and content pages. Each one is a real LinkTrixx URL, live at the time of writing, and each one is linked below so you can open it and check it yourself.
- https://linktrixx.com/, the LinkTrixx homepage, the most important page on the site and the one every visitor and every crawler meets first.
- https://linktrixx.com/link-building-services/, the main service page, which describes the core LinkTrixx offer and is one of the money pages the business wants found.
- https://linktrixx.com/blog/, the blog index, which lists the published articles and is updated every time a new article goes live.
- https://linktrixx.com/what-is-utm-tracking/, a published article that explains UTM tracking, and the first blog in the UTM Builder set, written as an educational guide.
- https://linktrixx.com/what-is-faq-schema/, a published article that explains FAQ schema, and the first blog in the FAQ Schema Generator set.
Five pages is a small list on purpose. It keeps the output short enough to read line by line, and it shows the pattern clearly: one url block per page, with the same four tags in each. A real site list would be longer, with every service page, every blog post, and every landing page you want indexed, but the shape of the file does not change. Whether the list has five URLs or five hundred, each page gets one url block, and the file opens and closes the same way.
Notice what is not on the list. No login page, no search results page, no tag archive, no duplicate version of a page with tracking parameters, and no page that redirects somewhere else. Those pages exist on most sites, and none of them belongs in a sitemap. The list holds only canonical, indexable pages that return a 200 status. That discipline is what keeps a sitemap trustworthy, and it is the first thing to get right before you paste anything into the tool.
Step 1: Open the Tool and Paste the URLs
Open the XML Sitemap Generator in your browser. The page loads with an empty URL box, the changefreq dropdown set to weekly, and the priority field set to 0.8. Paste the five URLs below into the box, one per line, exactly as shown, with no extra spaces and no blank lines between them. Blank lines are ignored by the tool, so a stray empty line does no harm, but a clean list is easier to read and easier to check.
https://linktrixx.com/
Link Building Services
https://linktrixx.com/blog/
What Is UTM Tracking and How Does It Work
https://linktrixx.com/what-is-faq-schema/
As soon as you paste, the XML preview on the right updates live. You do not need to click a build button or press enter. The tool rebuilds the preview on every keystroke, so the output you see is always the output for the list as it stands right now. That live update is useful while you work: if you delete a URL from the list, its url block disappears from the preview at once, and if you add one, a new block appears. There is no save step and no waiting.
Use the full address for every URL, including the https part and the trailing slash where the page uses one. A line without a scheme, such as linktrixx.com/blog/, is not a valid URL, and the tool will skip it and list it below the output. A line that is not a URL at all, such as a page title pasted by mistake, is skipped the same way. The tool is strict about shape and silent about meaning, so the check that each URL is the right page, and that the page loads, is yours to do before you paste.
Step 2: Set Lastmod, Changefreq and Priority
The three optional fields sit beside the URL box, and each one applies to every URL in the list. For this example, the lastmod field was left blank, the changefreq dropdown was left on its default of weekly, and the priority field was left on its default of 0.8. Those are the choices shown in the output below, and each one deserves an explanation, because the defaults are sensible but they are not right for every site.
Lastmod: Left Blank, So the Tool Fills In Today
The lastmod field is a date picker. If you leave it blank, the tool fills in the current date for every URL, which on the day this example was built was 12 November 2026. That is convenient, and it is honest in one specific case: when you are building a sitemap for pages that really were published or changed recently. The five pages in this example include two articles published in the last two days and a blog index updated with them, so a current date is a fair description of the list as a whole.
For your own site, think before you accept the default. Google uses lastmod to decide when to crawl a page again, and it only trusts dates that reflect real changes. If your pages have not changed in months, a current date is a small lie, and a file full of small lies teaches Google to ignore the dates. The better habit is to set lastmod to the date each page was last changed in a way a visitor would notice, such as a corrected fact or a new section, and to leave the field blank only when the pages really are fresh. If you cannot track real change dates, leave the tag out by clearing the field after the tool fills it, or rebuild the file with no date at all. A sitemap without lastmod is still valid, and it is better than a sitemap with dates Google cannot trust.
Changefreq: Weekly, the Default
The changefreq dropdown offers always, hourly, daily, weekly, monthly, yearly, and never, plus a blank choice for no changefreq at all. Weekly is selected by default. For the five pages in this example, weekly is a reasonable middle value: the blog index changes whenever a new article is published, the service page changes when the offer is updated, and the articles themselves change rarely. But remember that Google ignores changefreq entirely, and has done so for years. The value is in the file because the protocol allows it, not because Google reads it. Set it honestly if you set it at all, and do not spend time tuning it for Google. The Google Search Central overview and the guide to building a sitemap both confirm that changefreq and priority are ignored by Google.
Priority: 0.8, the Default
The priority field takes a number from 0.0 to 1.0, in steps of 0.1, and 0.8 is filled in by default. Priority compares pages inside your own site only, with 1.0 the most important, and Google ignores it too. A common pattern is to give the homepage 1.0, main service pages 0.8, and ordinary blog posts 0.5, which at least keeps the file readable for humans. This example leaves 0.8 for all five pages, which is fine, because the number carries no ranking weight either way. What matters is the list of URLs, and whether each one is a page worth indexing. If you want different priorities per page, build the file once per group and join the results, or edit the downloaded file by hand.
Step 3: Read the Live Preview
With the five URLs pasted and the three fields left on their defaults, the preview shows the finished sitemap. Here is the exact XML the tool produced for the exact inputs above, copied from the preview without a single character changed.
<?xml version="1.0" encoding="UTF-8"?>
<urlset xmlns="http://www.sitemaps.org/schemas/sitemap/0.9">
  <url>
    <loc>https://linktrixx.com/</loc>
    <lastmod>2026-11-12</lastmod>
    <changefreq>weekly</changefreq>
    <priority>0.8</priority>
  </url>
  <url>
    <loc>https://linktrixx.com/link-building-services/</loc>
    <lastmod>2026-11-12</lastmod>
    <changefreq>weekly</changefreq>
    <priority>0.8</priority>
  </url>
  <url>
    <loc>https://linktrixx.com/blog/</loc>
    <lastmod>2026-11-12</lastmod>
    <changefreq>weekly</changefreq>
    <priority>0.8</priority>
  </url>
  <url>
    <loc>https://linktrixx.com/what-is-utm-tracking/</loc>
    <lastmod>2026-11-12</lastmod>
    <changefreq>weekly</changefreq>
    <priority>0.8</priority>
  </url>
  <url>
    <loc>https://linktrixx.com/what-is-faq-schema/</loc>
    <lastmod>2026-11-12</lastmod>
    <changefreq>weekly</changefreq>
    <priority>0.8</priority>
  </url>
</urlset>
Below the preview, the note under the output reads “5 URLs in your sitemap.” That count is the tool telling you it accepted all five lines. If a line had been skipped, the note would say so instead, and name the skipped line. In this run, nothing was skipped, because all five lines are valid URLs.
Read the output once from top to bottom before you download it. Check that every URL you pasted appears once, that no URL appears twice, that the lastmod date is the one you intended, and that the changefreq and priority values are the ones you set. The file is short enough to check by eye at five URLs. At fifty URLs, check it in sections, and at five hundred, check the count in the note and spot check a few blocks. A sitemap with a typo in a URL is worse than no sitemap for that page, because Google will try to fetch an address that does not exist.
What Each Line in the Output Means
The output looks like code, but every line has a plain meaning, and understanding it helps you spot errors and explain the file to anyone else. Here is the output again, broken down piece by piece.
The XML Declaration
The first line, starting with a question mark inside angle brackets, declares the file as XML, version 1.0, using the UTF 8 character set. Every sitemap starts this way. It tells any program reading the file how to parse it. You never edit this line. The tool writes it for you, and it is the same in every sitemap the tool builds.
The urlset Element
The second line opens the urlset element and names the sitemap protocol, version 0.9, at sitemaps.org. That address is a namespace, a label that says which rules this file follows. Google, Bing, and Yahoo all support version 0.9, which is why one file works for every major search engine. The last line of the file closes the element. Everything between the two lines is the list of pages.
One url Block per Page
Each page gets one url block, opened and closed with url tags. Inside the block, four tags describe the page. The loc tag holds the full address of the page, including the https part. The lastmod tag holds the date the page was last changed, filled in here as 12 November 2026 because the field was left blank and the tool used the current date. The changefreq tag holds the value from the dropdown, weekly in this example. The priority tag holds the number from the priority field, 0.8 in this example. The order of the tags inside each block is the same every time: loc, lastmod, changefreq, priority.
Notice that all five blocks are identical except for the loc value. That is expected, because the three optional fields apply to every URL in the list. If your pages need different lastmod dates, build the file in groups, one group per date, and join the blocks by hand, or edit the downloaded file in a text editor. The tool builds the shape. You own the dates.
Step 4: What Happens to a Line That Is Not a Valid URL
Not every line you paste will be a URL, and the tool handles that gracefully. It checks each line by trying to read it as a web address. A line that has no scheme, such as linktrixx.com/blog/, is skipped. A line that is not an address at all, such as a page title pasted by mistake, is skipped. A line with only spaces is ignored. Each skipped line is listed below the output, in a note that reads “Skipped 1 line that is not a valid URL:” followed by the line itself, or “Skipped 2 lines” when more than one line fails. The count in the note tells you how many URLs made it into the file, so you can compare it with the number of lines you pasted.
In this run, all five lines were valid, so nothing was skipped and the note read “5 URLs in your sitemap.” That is the result you want on your own list too. If the note reports a skipped line, do not ignore it. Read the line, fix the address, and paste it again. A skipped line is a page that will not be in your sitemap, and if it is an important page, it will stay invisible to Google until you fix the typo and rebuild.
One limit to know: the tool checks the shape of a URL, not the page behind it. A line such as https://linktrixx.com/this-page-does-not-exist/ is a valid shape, so the tool will accept it and put it in the file, even though the page returns a 404 error. That is why the check in the choosing step matters. Paste only URLs you have opened and seen load, and your sitemap will contain only live pages.
Step 5: Copy or Download sitemap.xml
When the preview looks right, get the file out of the tool. Click Copy to copy the XML to your clipboard, then paste it into a plain text editor and save it as sitemap.xml. Or click Download, and the tool saves the file directly as sitemap.xml. Both give you the same content. Copy suits a quick edit before saving, such as changing a lastmod date on one page. Download suits a straight upload, with no edits in between.
Save the file as sitemap.xml, exactly that name, in plain text with no extra formatting. Do not save it as a Word document, do not save it with a .txt extension, and do not let your editor add extra characters at the start of the file. A sitemap must be a clean XML file, and most text editors will save it correctly if you choose plain text and type the name yourself. If your editor asks about the encoding, choose UTF 8, which matches the declaration at the top of the file.
Step 6: Upload the File to Your Site Root
Upload sitemap.xml to the root folder of your website, the folder that holds your homepage, so that the file loads at yourdomain.com/sitemap.xml. For LinkTrixx, that address is https://linktrixx.com/sitemap.xml. How you upload depends on your hosting: a file manager in your hosting control panel, an FTP client, or the media and file tools in your content platform. The method does not matter. The address does.
After uploading, open the address in your browser and check that the file loads. You should see the XML text, or your browser may show it as a formatted list of links. Either view is fine. What matters is that the address returns the file and not an error page. If it returns a 404, the file is in the wrong folder. Move it to the root and try again. If it loads, the file is in place, and the next step is to tell the search engines about it.
Step 7: Add the Sitemap to Robots.txt
Open your robots.txt file, which lives at yourdomain.com/robots.txt, and add a line that points to the sitemap, such as Sitemap: https://yourdomain.com/sitemap.xml. For LinkTrixx, the line reads Sitemap: https://linktrixx.com/sitemap.xml. That line helps any crawler that reads robots.txt first to find the sitemap without a Search Console submission, and it costs nothing to add.
If your site has no robots.txt file yet, build one with the free Robots.txt Generator. The guide on how to use the free robots.txt generator walks through the whole file, and the worked example in the robots.txt generator worked example shows the sitemap line in place on a real file. Keep the two files consistent: a page listed in the sitemap must be crawlable, and a page blocked in robots.txt must stay out of the sitemap. The comparison of the free robots.txt generator with paid tools explains why that single line is worth adding.
Step 8: Submit the Sitemap in Google Search Console
Open Google Search Console and select your property. If you have not verified ownership of the site yet, do that first, because Search Console will not accept a sitemap for a property you do not own. Then open Indexing in the left menu, and click Sitemaps. Under Add a new sitemap, enter the sitemap address. If the field already shows your domain, enter only the remaining path, such as sitemap.xml. Then click Submit.
Search Console will fetch the file and show a status for it. A status of Success means Google fetched and read the file, and the report shows how many URLs it discovered. For the five page file in this example, that number should be five. If the status shows an error, read the message: a common error is a URL in the file that returns a 404, a file that is too large, or a file that is not valid XML. Fix the flagged lines and submit again. The Shopify guide to creating a sitemap describes the same submission flow, and the steps are the same on any site.
Submit the same file in Bing Webmaster Tools too, if Bing traffic matters to you, because the two search engines do not share submissions. The sitemap file itself needs no changes for Bing: the same file works for both, because both support the same protocol.
Step 9: Check the Sitemaps Report
Submitting is the start, not the end. Open the Sitemaps report in Search Console a day or two later and read the status and the last read date. Success with five URLs discovered is the result you want. If the last read date is old, Google may not have needed to read the file again, because nothing changed. Update a page, refresh its lastmod date, and submit again if you want Google to take a fresh look.
Remember that a Success status means the file was read, not that every URL in it was indexed. Indexing is reported separately, in the Pages section of Search Console, where you can see how many of your submitted URLs Google chose to index. A page that is found but weak may still be left out of the index, and that is a content problem, not a sitemap problem. Check the Pages report whenever you check the Sitemaps report, and fix the pages that Google flags, because healthy pages and a current map work together.
When One Sitemap Is Not Enough
A single sitemap can hold up to 50,000 URLs and must be no larger than 50 MB when uncompressed. Most sites will never come close to those numbers, and the five page file in this example is far inside them. But a large store, a marketplace, or a directory with tens of thousands of pages will hit the limit, and the fix is to split the pages across several sitemaps and list those files in a sitemap index file.
The split is usually done by type: one sitemap for products, one for categories, and one for blog posts, for example. Each file still obeys the same limits, and the index file lists the address of each one. You submit the index file in Search Console, not the individual files, and Google follows the links inside it. The Google guide to large sitemaps explains the splitting rules in full, and the companion guide on what an XML sitemap is shows an example index file with two sitemaps listed inside it.
For a small site, none of this is needed. One file, built with the free tool, uploaded once, and submitted once, is enough. If your site grows past the limit later, split it then. Do not build an index file for a site with fifty pages, because the extra complexity buys nothing and adds a place for errors to hide.
Common Mistakes in This Workflow
Most sitemap problems come from the list, not from the tool. The tool builds exactly what you paste, so a mistake in the list becomes a mistake in the file. The five mistakes below are the ones that appear most often, and each one is easy to avoid.
Mistake 1: Pasting URLs That Do Not Load
A URL that returns a 404, a URL that redirects somewhere else, and a URL that is a duplicate of another page with tracking parameters all waste crawl budget and teach Google to distrust the file. Open every URL before you paste it, and paste only pages that load with a 200 status. The tool cannot do this check for you, because it only checks the shape of each line.
Mistake 2: Pasting the Wrong Version of an Address
Use the canonical address of each page, the one you want shown in search results, and use the same form everywhere. If your site uses https without www, every entry should use https without www. Mixing forms creates duplicate entries for the same page, and Google has to sort out which one is real. Copy each URL from the browser address bar while the page is open, and you will get the right form every time.
Mistake 3: Leaving Fake Lastmod Dates in the File
Accepting the default date on pages that have not changed in months makes the dates meaningless, and Google notices. Set lastmod to the date each page was last changed in a way a visitor would notice, and leave the tag out when you cannot track real change dates. A sitemap without lastmod is still valid, and it is better than a sitemap with dates Google cannot trust.
Mistake 4: Forgetting to Upload the File After Downloading It
Downloading sitemap.xml is not the same as publishing it. The file has to live at yourdomain.com/sitemap.xml before Google can read it, and before Search Console can accept the submission. Upload it, open the address in your browser, and check that it loads. Then submit it. A file that sits in a downloads folder helps nobody.
Mistake 5: Never Updating the File
A sitemap is not a one off job. New pages need new entries, deleted pages need their entries removed, and changed pages need new lastmod dates. Tie the update to the publishing routine: every time a page goes live, add it to the sitemap, and every time a page is removed, take it out. A sitemap that still lists pages deleted months ago keeps sending Google to dead ends, and Google will trust it less each time.
What This Example Proves About the Tool
The example proves three things about the free generator. First, it builds a valid sitemap from a plain list of URLs, with no code to write and no signup to complete. Second, its defaults are sensible: weekly changefreq and 0.8 priority produce a file that follows the protocol, and the lastmod default of the current date is honest when the pages really are fresh. Third, it is transparent about what it skips: an invalid line is listed below the output instead of vanishing silently, and the count tells you exactly how many URLs made it into the file.
It also proves the limits of the tool, and knowing them matters as much as knowing what it does. It cannot crawl a site, so you must supply the list. It cannot check whether a page loads, so you must check that yourself. It applies one set of values to every URL, so pages that need different lastmod dates need separate runs or a hand edit. None of those limits is a flaw. They are the shape of a simple tool, and a simple tool used carefully beats a complex tool used carelessly.
The same care applies to the rest of the free tool set. The Word Counter checks that a page has enough content to be worth indexing, and the guide on how to use the free word counter shows it on a real page. The Keyword Density Checker shows whether a target phrase appears naturally, and the guide on how to use the free keyword density checker explains how to read the result. The FAQ Schema Generator adds structured data to a page, and the guide on what FAQ schema is explains why that helps a page stand out. The UTM Builder tags campaign links, and the guides on what UTM tracking is and the UTM builder worked example show it on a real campaign. All of them are free, run in the browser, and sit in the same free SEO tools hub as the sitemap generator.
Once the pages are found, the next job is earning the links that help them rank. The LinkTrixx link building services build those links on relevant sites, the white label link building service does the same for agencies who resell under their own brand, and the guest posting service places content on blogs in your niche. The competitor backlink gap analysis shows where rivals are getting links you are not, and the comparison of guest posts vs link insertions explains the two most common ways to earn them. For a wider view, the best link building agencies for ecommerce companies list puts LinkTrixx in context with the wider market, LinkTrixx reviews show what clients say, and the guide to link building outreach email templates helps you turn new pages into new links. The comparison of the free UTM builder with paid analytics tools shows how the free tools hold up against paid options.
Build Your Sitemap Now
You now have the full workflow: choose the pages, check that each one loads, paste the list into the free XML Sitemap Generator, set the three optional fields or leave them on their defaults, read the preview, copy or download sitemap.xml, upload it to your site root, add it to robots.txt, submit it in Google Search Console, and check the report. The example in this article did exactly that for five real LinkTrixx pages, and the output is printed above, line by line, so you can compare your own file against it.
Open the tool, paste your own page list, and build your sitemap today. Before choosing a tool, compare free XML sitemap generator vs paid SEO tools. If you want the concepts behind the steps, read what an XML sitemap is and why your website needs one first. And if your pages also need the links that turn a found page into a ranking page, the LinkTrixx link building services are the next step. The SaaS link building service covers software sites in particular, and the LinkTrixx blog has a new guide every day on the topics that bring clients in from search.
Frequently Asked Questions
How do I create an XML sitemap for my website?
Open the free LinkTrixx XML Sitemap Generator, paste your page URLs one per line, set the lastmod date, changefreq, and priority or leave them on their defaults, then copy the XML or download it as sitemap.xml. Upload the file to the root of your website so it loads at yourdomain.com/sitemap.xml, add it to your robots.txt file, and submit it in Google Search Console.
Does the free XML sitemap generator crawl my website?
No. The generator cannot crawl a site. It only turns the URLs you paste into a sitemap, so you need to supply the list of pages yourself, one URL per line. It checks that each line is a valid URL shape and lists any line it skips, but it cannot check whether a page loads or whether a page is set to noindex, so check each URL by hand before you paste it.
What lastmod date should I use in my sitemap?
Use the date the page content was last changed in a way a visitor would notice, such as a corrected fact or a new section. If you leave the field blank, the tool fills in the current date for every URL, which is honest only when the pages really are fresh. If you cannot track real change dates, leave the tag out entirely, because a sitemap without lastmod is still valid and is better than a sitemap with dates Google cannot trust.
Where do I upload my sitemap.xml file?
Upload sitemap.xml to the root folder of your website, the folder that holds your homepage, so the file loads at yourdomain.com/sitemap.xml. After uploading, open that address in your browser and check that the file loads instead of showing an error page. Then add the sitemap address to your robots.txt file and submit it in Google Search Console.
How long does Google take to read a new sitemap?
Google does not publish a fixed time for reading a new sitemap, and the time varies by site. After you submit it in Google Search Console, the Sitemaps report shows a status and the date Google last read the file, so you can check whether it has been read. A status of Success means Google fetched and read the file, and the report shows how many URLs it discovered.
Can I include more than 50,000 URLs in one sitemap?
No. A single sitemap can contain up to 50,000 URLs and must be no larger than 50 MB when uncompressed. If your site has more pages than that, split them across several sitemaps, for example one for products and one for blog posts, and list those files in a sitemap index file, which you then submit in Google Search Console.